
Yearbook Ads
Import Previous Ad Prices
Create New Ads
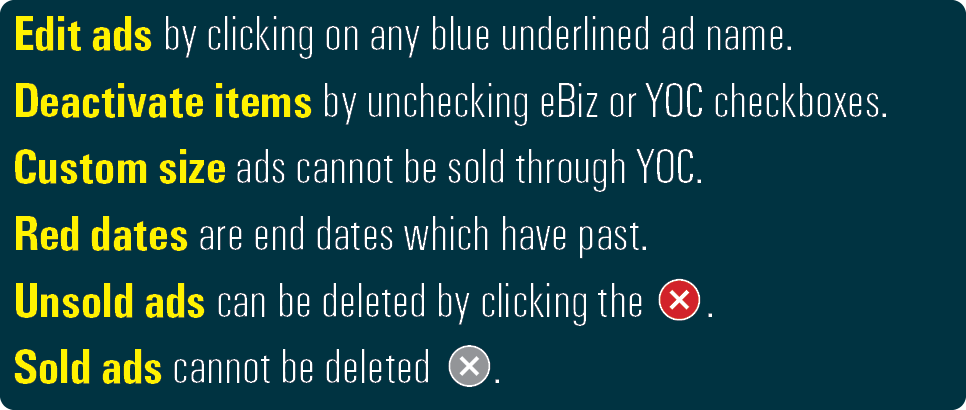
Edit Ads and Tier Pricing
Ad Wizard
Ad Design Styles
eBusiness gives you multiple options for creating your yearbook ad sale items. Import last year’s ads, use the Wizard which provides up to 10 pre-specified ads, or create your own with the fraction calculator to estimate prices.
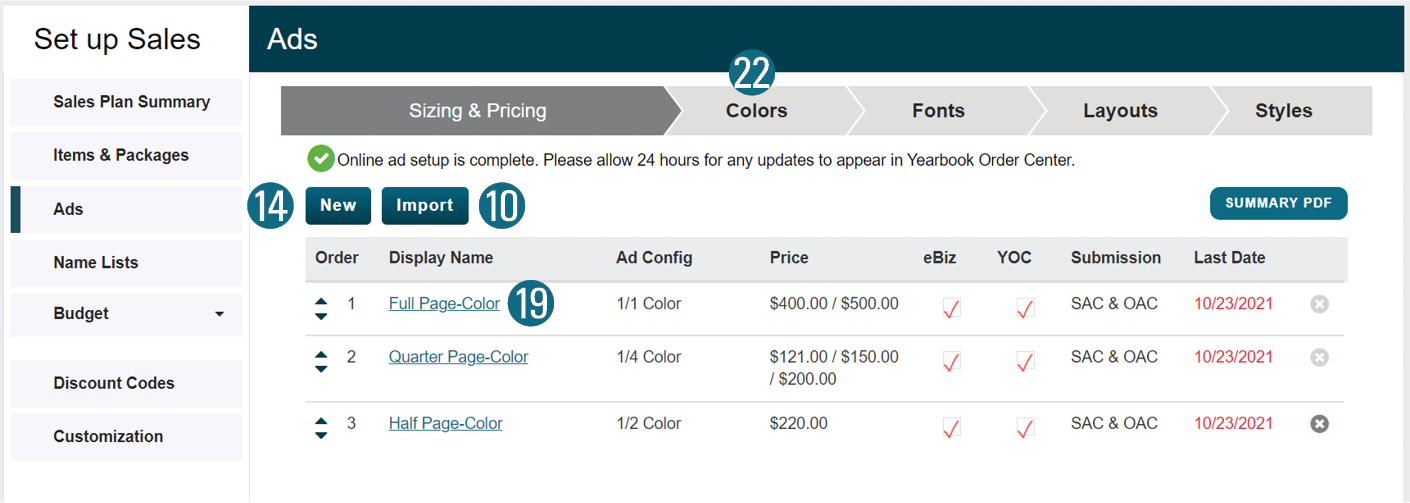
1. From the Setup menu, select Setup Sales.
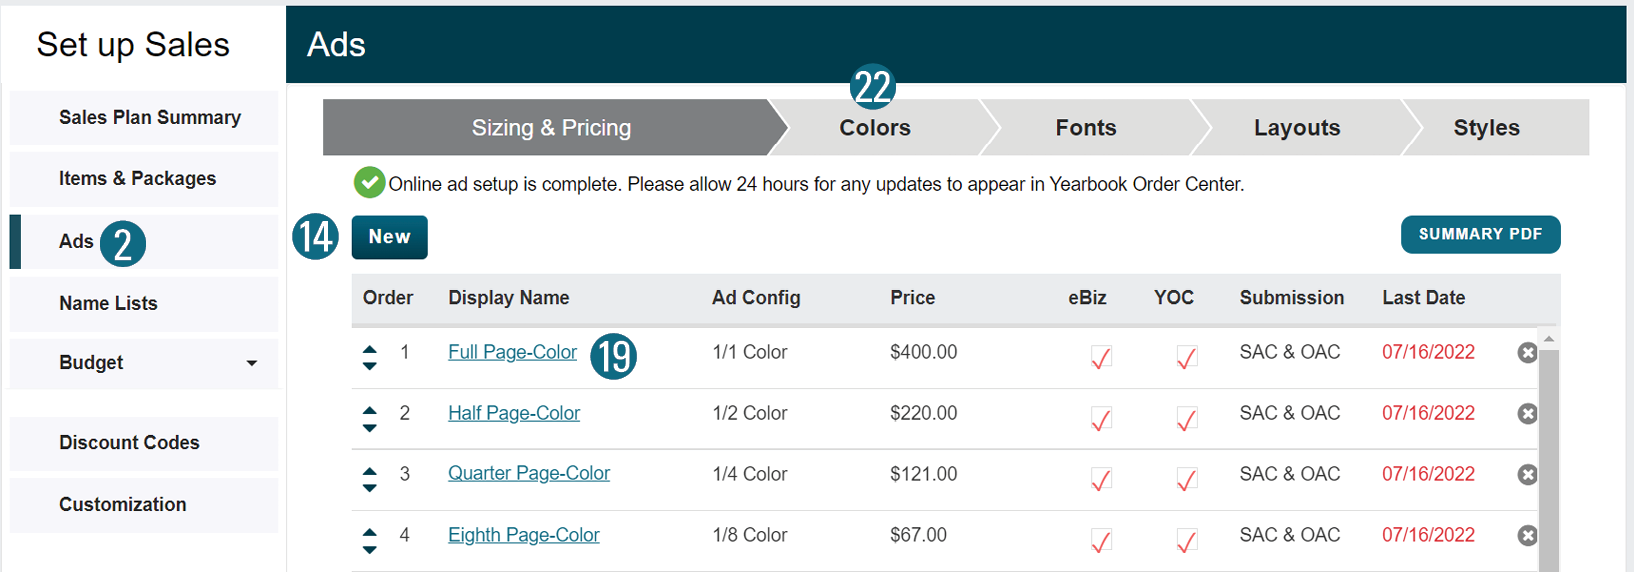
2. Click the Ads button.
To Use the Ads Wizard:
The Ad Wizard walks you through creating ad sizes and pricing.
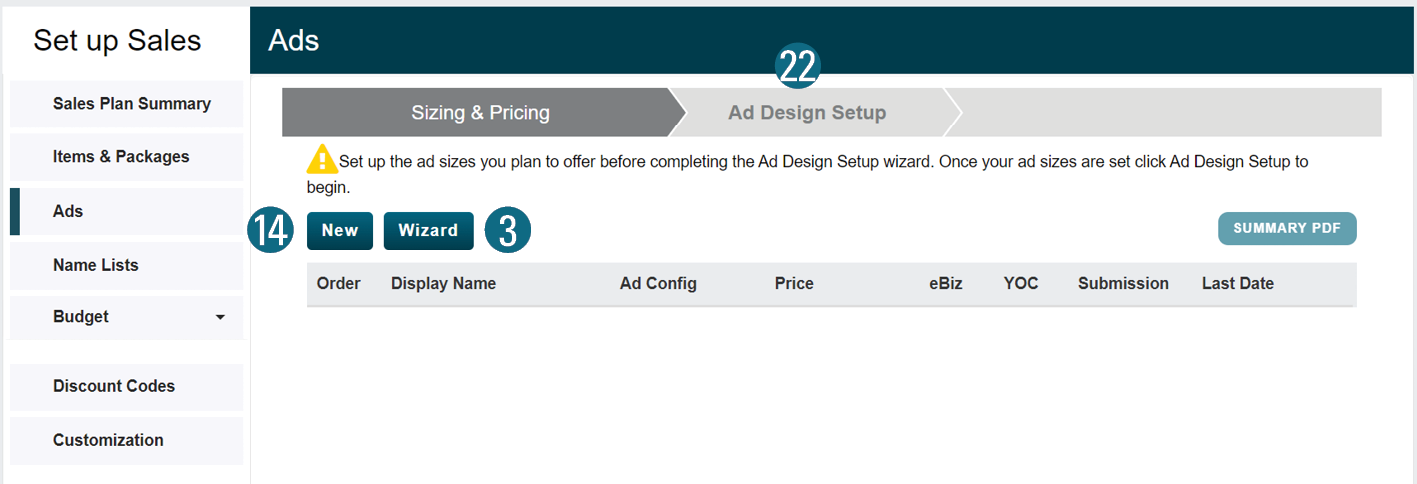
3. Click the Wizard button (above).
4. Enter a base price of the Full Page Color/BW ad.
All ad prices will be automatically calculated.
5. Specify the following:
•Separate Pricing for online/in-school ads.
•Price Rounding to the nearest $5 increment.
•B/W, Color, or Both.
6. Click Add to create an ad that is not on the list.
7. To manually price, edit the Sale Price.
8. Click the ![]() to remove any unnecessary ads.
to remove any unnecessary ads.
9. Click Save to return to Setup Sales.

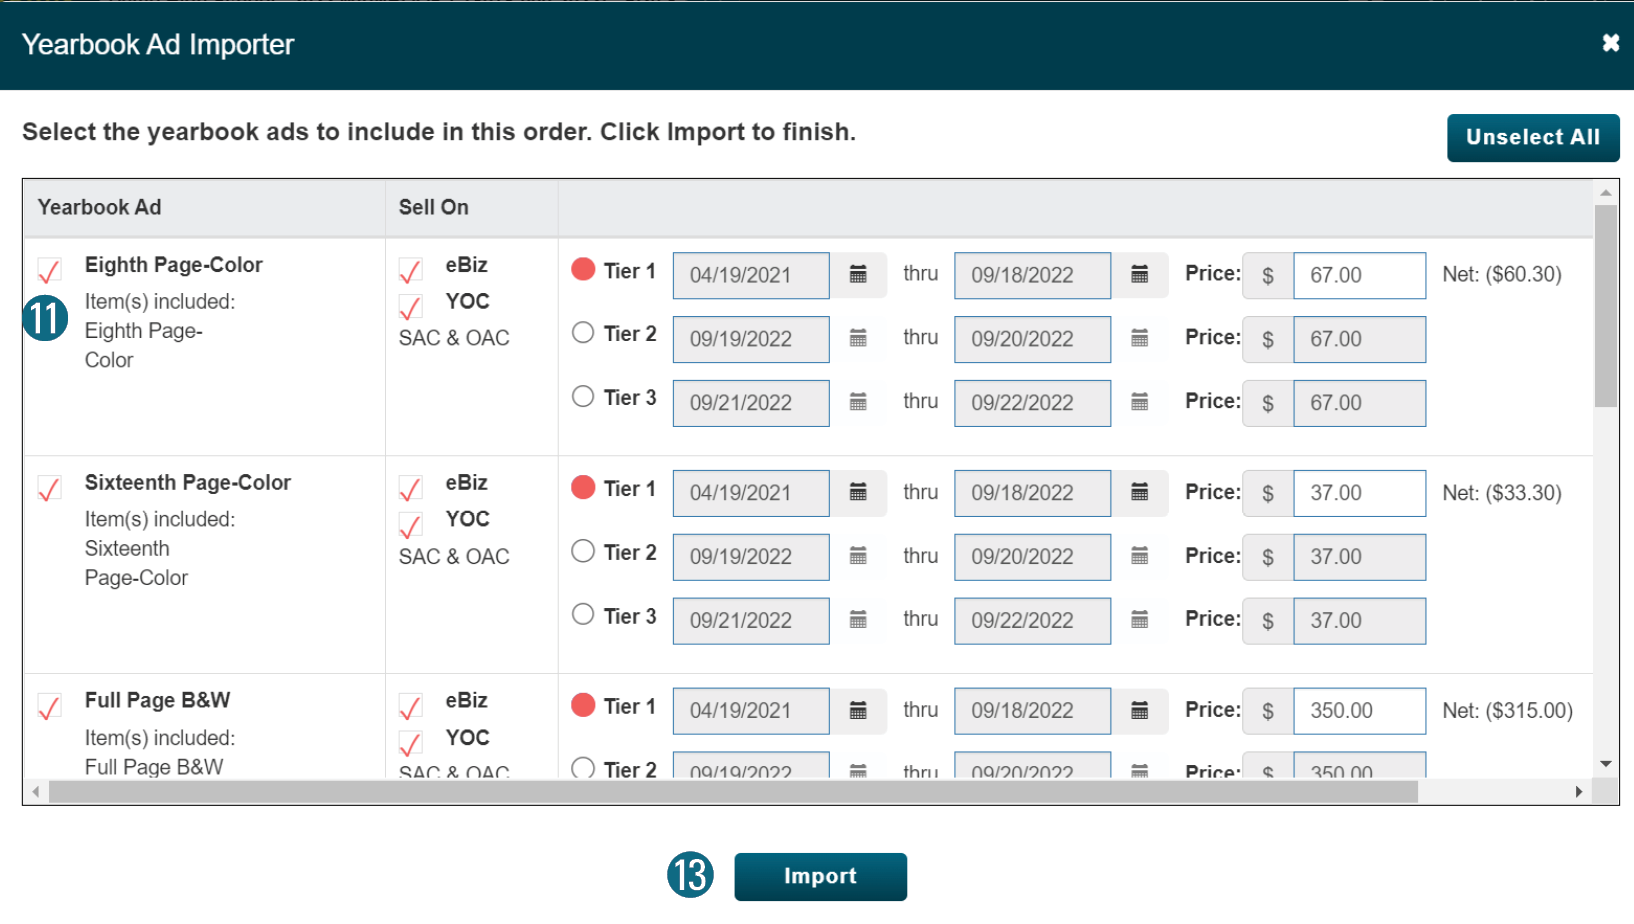
To Import Last Year’s Ad Sizes and Prices:
If eBusiness has the previous years ads, they can be imported and edited
10. Click the Import button.
11. Check the box next to all necessary ads.
12. Edit prices and dates as necessary.
13. Click the Import button.
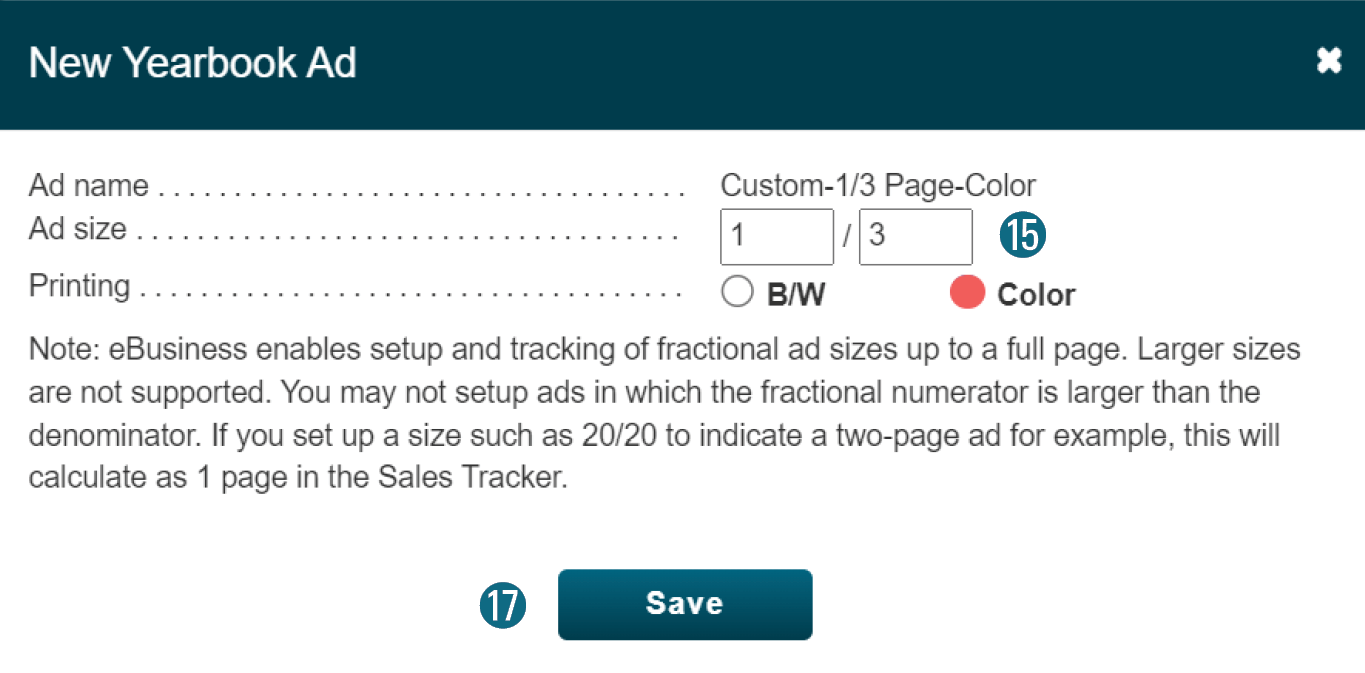
To Create New Ads:
14. Click the New button (above).
15. Enter the Size.
16. Select either B/W or Color.
17. Click the Save button.
18. Use the Ad Editor to set the pricing.
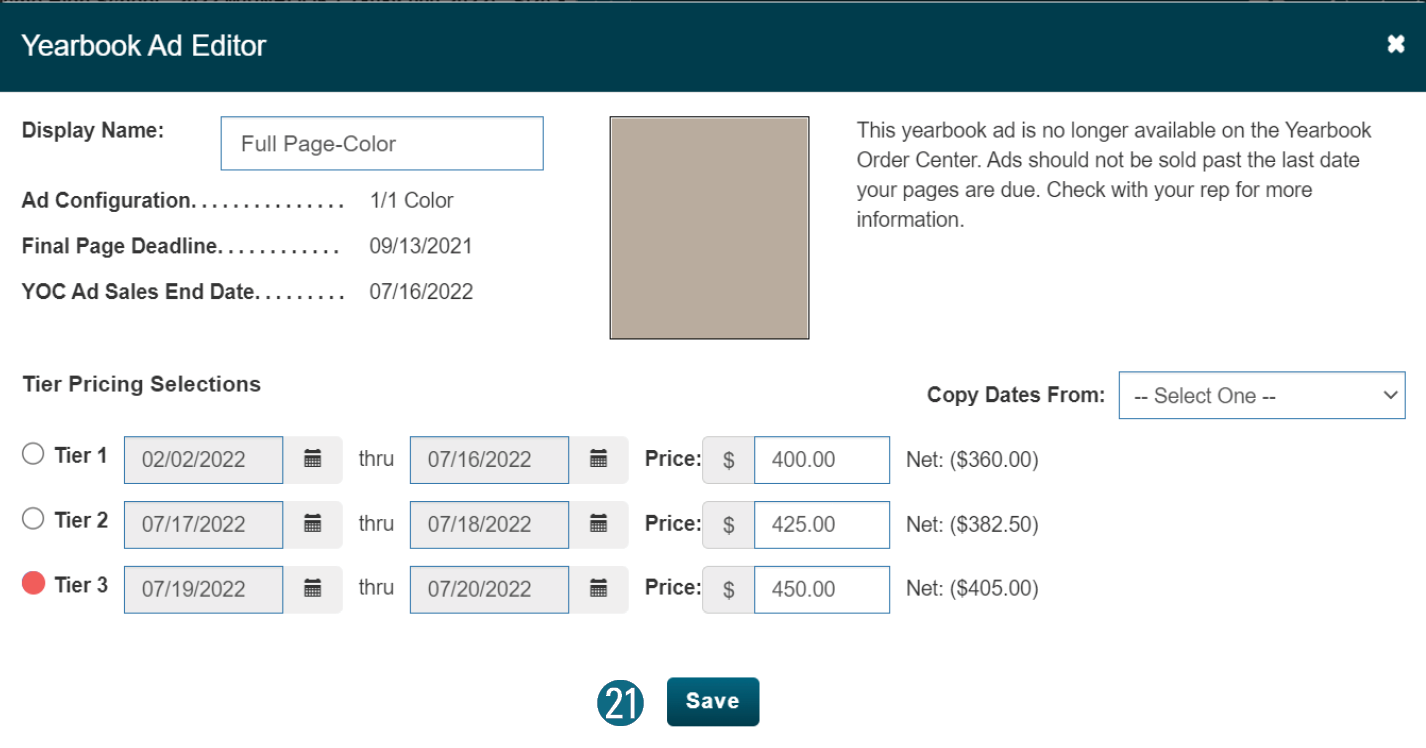
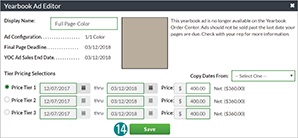
To Edit Ads and Optional Tier Pricing:
19. In Yearbook Ad Setup, click blue underlined package name (above).
20. Make any necessary changes.
21. Click the Save buttons.
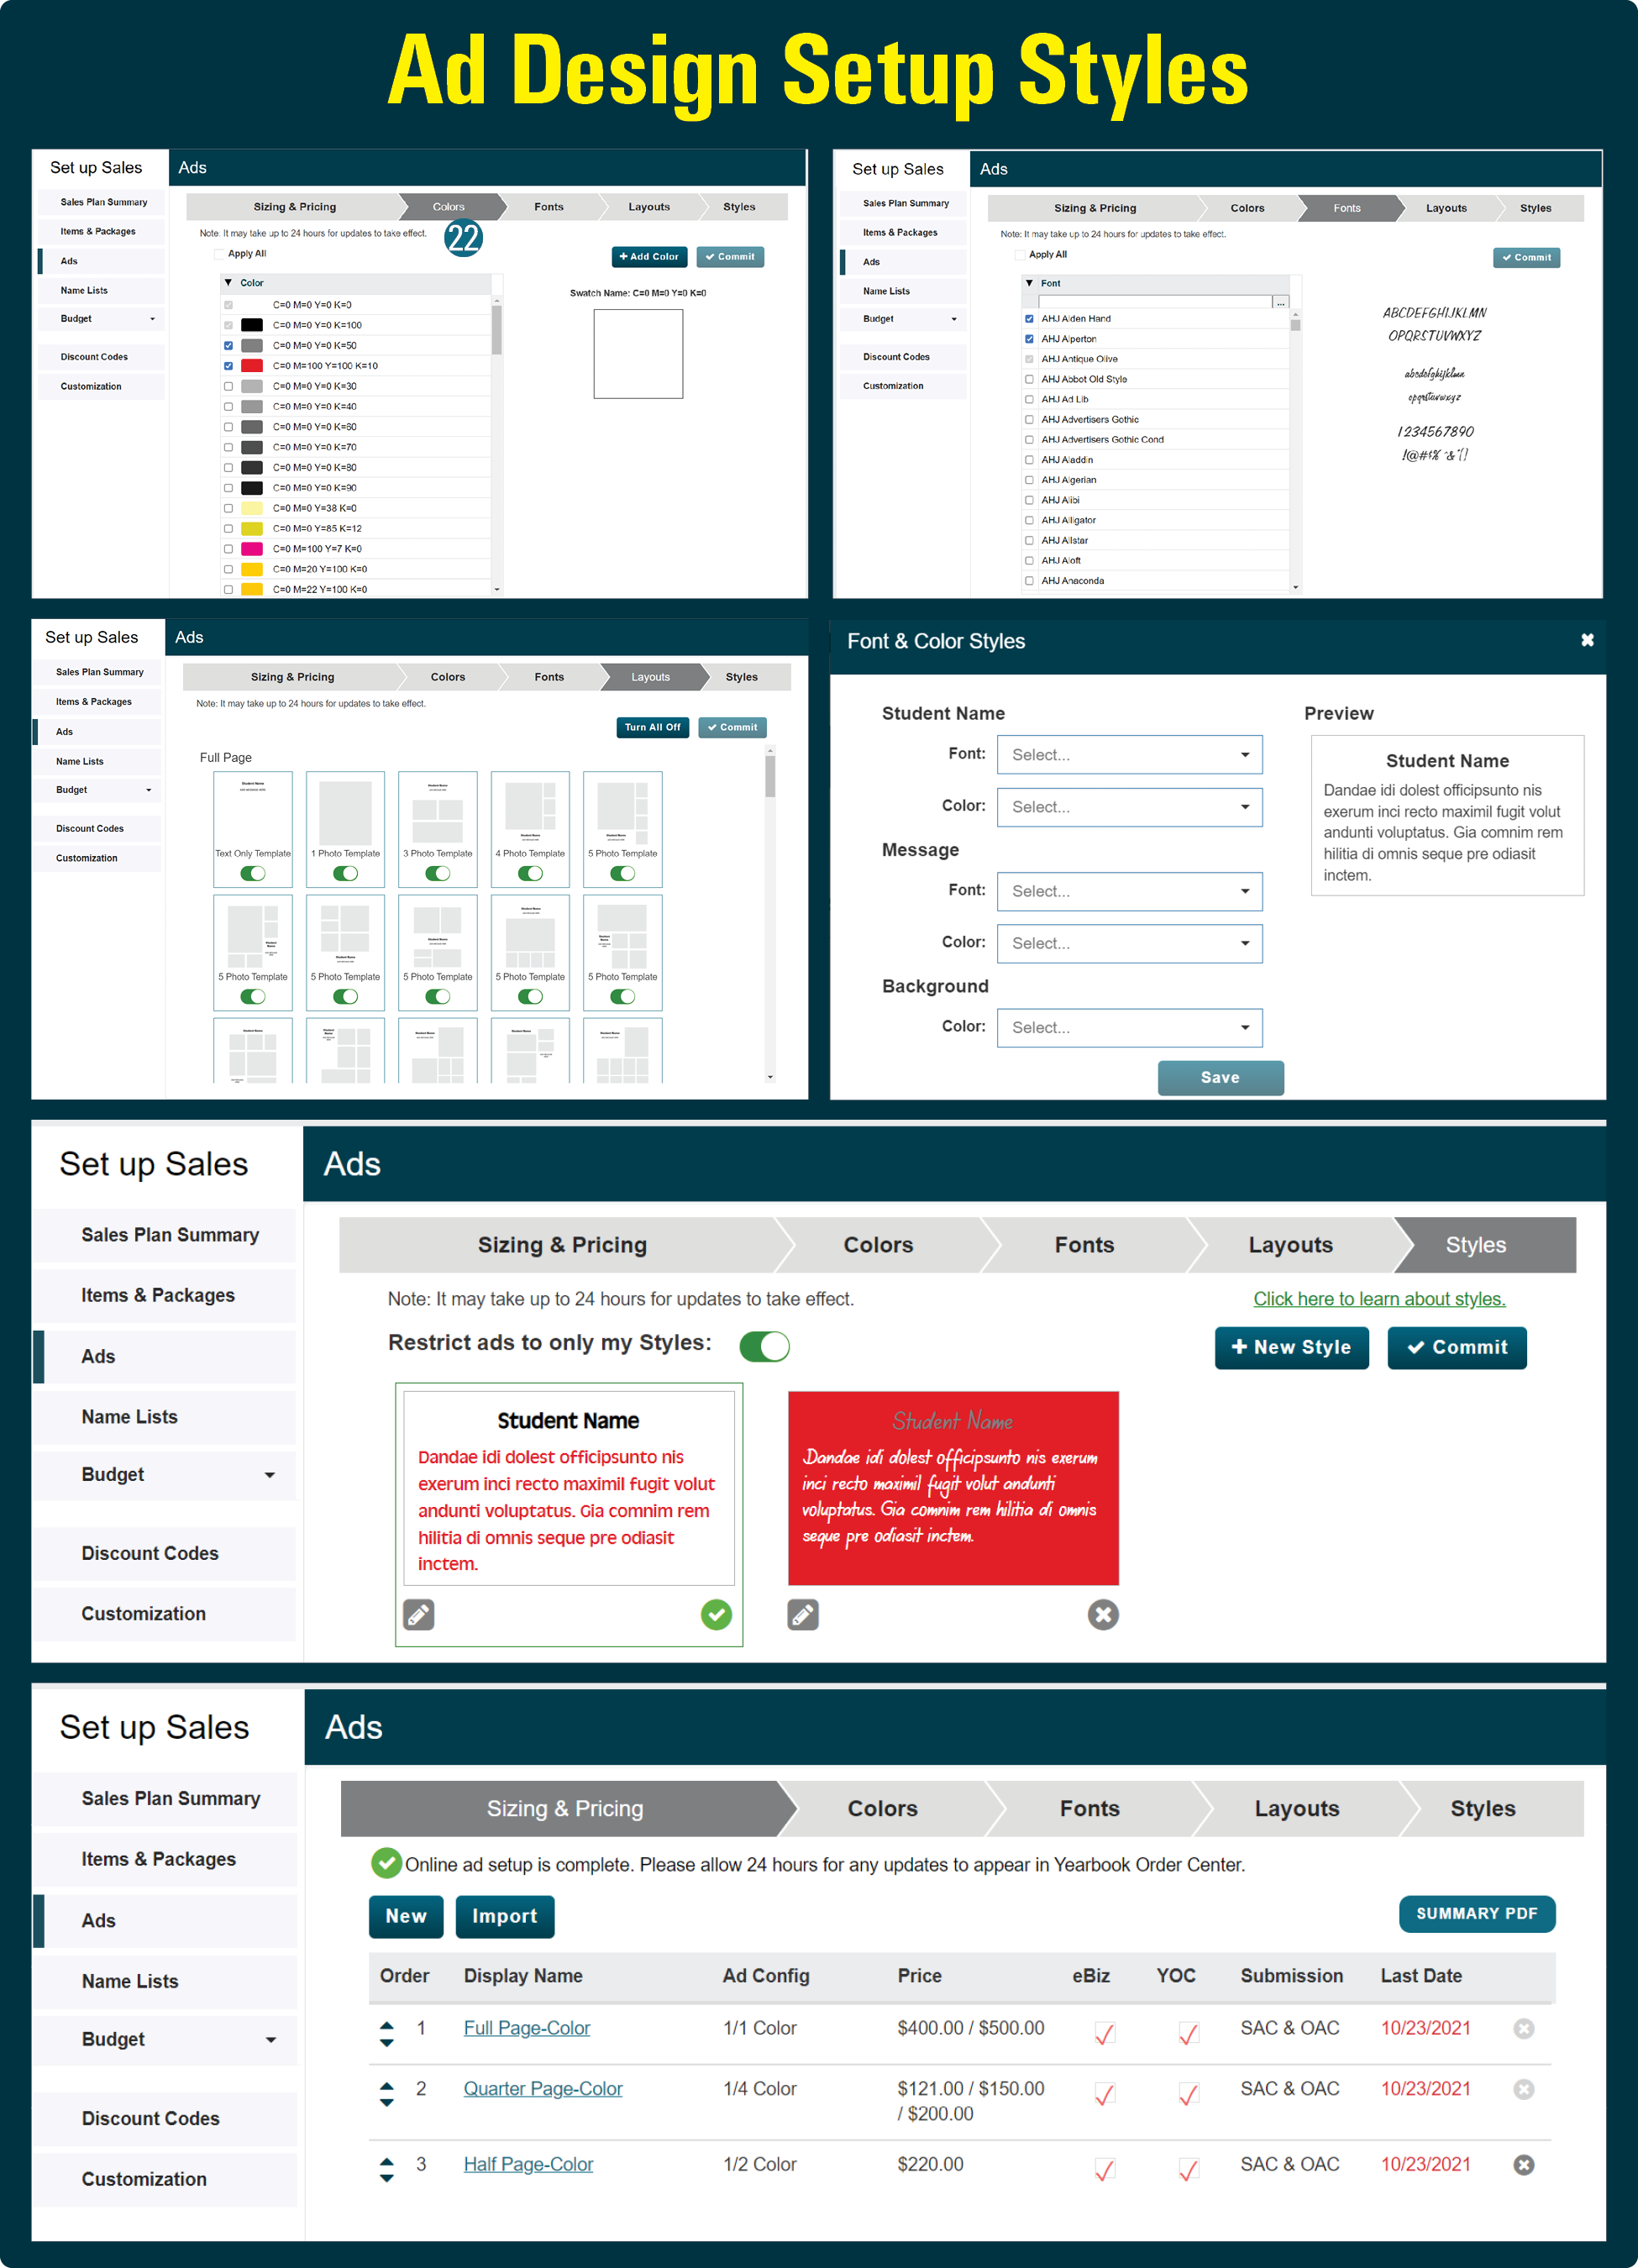
Ad Design Setup Styles
Choose how your buyers will create their ads through OAC.
•Restrict OAC users to color, font, background, and style combinations you select. This creates consistency in your ad section, but limits buyer options.
•Give buyers some variety, by adding additional styles, but still restricting font and color combinations.
•Allow your buyers to freely choose from any font, font color, background color, and style you’ve activated.
22. Click the Colors arrow for Ad Design Setup.
23. Step through the set up steps.
24. Commit your choices.
Note: You will need at least 2 colors (we recommend activating black and white), 1 font, and 1 default style. Additional colors, fonts, and style combinations can be created anytime.
![]()
![]()
![]()
![]()